Showing posts with label recipes. Show all posts

Wednesday, May 25, 2016

THE GREAT BABY FOOD EXPERIMENT: Intro

Hello again! I'm back!  I want to introduce you to my newest experiment...

I have a TON of baby food in my cabinet!  My 16 month old son is no longer interested in eating it as-is because he wants to feed himself finger foods all the time. Well, with almost 100 jars of baby food in the cabinet and 6 containers of baby cereal, I decided to go online and see what ways I can find to use it up.

Follow me in the next few posts and see what I did with this hoard of baby food...

Friday, July 19, 2013

Incredibly Easy MONKEY BREAD!


My mom had some leftover cheap canned biscuits that she bought at the local Food Depot a few weeks ago and she asked me if I knew what to do with them. I thought it would be fun to make some monkey bread. We looked online for recipes and put them all together and created our own very simple "eyeball" recipe that can be made almost completely by kids. I doubled the recipe and let my two youngest boys have thier hands in the kitchen and they did an excellent job!

Ingrediants:
4 cans of cheap canned biscuits
1 stick of margerine
about 3/4 cup white sugar
about 1/4 cup brown sugar
about 1 tbsp cinnamon
cooking spray
2 gallon zipper bags (1 per child)
bundt pan
butter knife
something to melt and mix the butter in
cutting board or clean surface to cut on

first open one can of biscuits and spread them out. Do not open all of the cans at once because the biscuits like to spread when the air hits them!


using the butter knife, cut each biscuit into four pieces.


place the pieces in your zipper bag for shaking later.

between each can of biscuits, we added a few shakes of cinnamon and a little sugar.

after adding the cinnamon and sugar, do the cinamon and sugar dance to mix it all together!

place the stick of butter in a microwave safe container and microwave it for 20-30 seconds. Take it out and stir in about 1/4 cup of brown sugar.

place all the biscuit pieces in the pan and then pour the butter mixture over the top. Place in a 350 degree oven for about 20 minutes.

yummy golden delicious MONKEY BREAD!


You can also add other things to your monkey bread like nuts or fruit or anything that you'd like. My oldest son wants some with cinabon icing on it! I saw a recipe for it on Pinterest I want to test out!


Was this easy enough for you? Give it a try and let me know what you think!

Tuesday, July 24, 2012

Doritos Locos Nachos


My family and I have fallen head over heels in love with the Doritos Locos Taco from Taco Bell. Aside from the fun of trying to say the tongue twister with a straight face at the Taco Bell drive in,  they taste AMAZING! 

I decided that I wanted to attempt to make my own Doritos Locos concoction so I created the Doritos Locos Nachos. Here is the recipe:

Ingredients:

1 large bag of Doritos (or store brand Nacho Tortilla Chips)
1 lb ground beef
1 package taco seasoning for beef
1/2 pound shredded cheddar cheese
1 small container sour cream
3 small tomatoes
1 small head lettuce (not pictured- somehow this ended up eaten before I made these)

1. Brown your ground beef and season it with the taco seasoning as directed on the package. Chop your tomatoes and shred the lettuce.

2. Start layering. Place your doritos in a single layer on your dish. Put some lettuce over your chips. Place about 3 tablespoons of meat on top of the doritos. Next layer your tomatoes. Add cheese and sour cream.

3. Devour and humm while you experience Heaven on Earth. Yumm!

That's it! Very simple but SO delicious! I hope you enjoy them!


Tuesday, May 29, 2012

DIY "Uncrustables"


Have you ever paid an exorbitant amount of money for a box of pre-made frozen peanut butter and jelly sandwiches? I hate to admit it, but I have. Much to my children's chagrin, I only bought them a few times. I just think it's crazy to pay that much for a frozen PB&J.

Today I am going to show you how to save some money and get back into the good graces of your frozen PB&J loving children! We are going to make our own "Uncrustables"!
First, you need to run into Wal-Mart and get a "Wonder Bread De-Cruster and Sealer". They are sold on Amazon for $6 but they are only $2 at Wal-Mart.

Then you will need the following items from your kitchen:


Bread (I buy name brand breads at Dollar Tree and freeze them)
Peanut Butter (or whatever "butter" your kids prefer/can eat)
Jelly (squirt kind is best- also sold in Dollar Tree!)
spoon or butter knife (for spreading)
Cutting board or clean flat surface
Zipper seal bags (I use sandwich size for the sandwiches and gallon size to put them all in)
Marker


1. Lay out six slices of bread in two rows of three. Spread your peanut (or whatever) butter onto all six slices of bread. Go close to the edges but try to leave a little room so the PB doesn't leak out when we seal the sammie.


2. Squirt some jelly onto three slices of bread. I give a good squirt in the center.

3. Place the non-jellied breads onto the jellied breads to create three sandwiches. Give them a little pat in the center to get that jelly spread a little in there.

4. Get your decruster and sealer ready! Place the sealer part inside the decruster and pull it up so it kind of sticks in place. Center the decruster on your bread, trying to keep it inside the crust (I noticed this is easier with round top bread). Press both the decruster and sealer onto the sandwich, giving it a lot of pressure. Now just press the decruster as hard as you can and wiggle it around until the crust comes completely off the sandwich.

5. Lift the decruster and sealer and check out your sandwich! Is that not awesome?!

6. Continue step 4 until you have three sandwiches and then repeat steps 1-5 to finish off your loaf of bread!


7. Now you are ready to pack these babies! Mark your gallon bags with pertinant information. I wrote the type of jelly on my bags but you may need to indicate the type of "butter" or other info so do that now. I also labeled one bag "crusts". Place one sandwich in each sandwich size zipper bag. Laying them flat, carefully place the bagged sandwiches inside the corresponding Gallon bag. Place all the crusts in the crust bag. These can be used for homemade crutons or, like us, you can take them to the pond for the ducks when you go!

8. Place all of your bags in the freezer and you are done- until lunchtime, that is!

9. To thaw in the microwave (my kids' preferred method) just remove from the zipper bag (I put the empty zipper bag back into the gallon bag for re-use) and wrap in a paper towel. Pop into the microwave and heat for about 45 seconds. Or, just leave your sandwich out with the bag open for a little while and it will thaw on it's own!


Thanks for stopping by! Alicia

Disclosure: I didn't get any freebies this time. I bought all of the items I used in this recipe but just mentioned the stores so that I can help you get the best deal :) The amazon link is an affiliate link, though.


Sometimes I link up at: Catholic Icing, Skip to My LouTatertots and JelloRaising ArrowsWomen Living Well, Titus 2sdays


Sunday, April 29, 2012

First Communion Cake Tutorial


Today was my middle son's first Communion day! We attend a small church so there were only 5 First Communicants. At a nearby church, there were 150! Amazing!

I made my son's cake using ideas that I pinned on Pinterest and then I added a few of my own ideas to create this gorgeous cake:


Want to make your own? Here's how:

First bake 24 cupcakes and cool them in the refrigerator. Then make some buttercream icing (or buy it). I used a recipe from Wilton to make my own buttercream icing. The recipe turned out perfect. I made two batches, one white and one blue. I had lots of blue left over!

 Next, you need a cake board to put this HUGE cupcake cake onto. I made my cake "board" from cardboard pieces glued together and then covered with fabric. I then taped some wax paper over the fabric for a beautiful background.

Now assemble your cake. Using a dab of icing on the bottom,"Glue" each cupcake to your board. Form a cross by placing sixteen cupcakes in 8 rows of two going vertically down my cake board. Then added four on each side to finish the cross.

Next, take the white icing and plop tons of it on top of the cross. Spread the icing, carefully ensuring that each cupcake is covered and that there are no visible gaps between the cupcakes. Using a large star tip and icing bag, just spread some blue icing to outline the cross. Using a smaller star tip and white icing, make stars to represent the rosary beads next to the cross. Leave a gap between every decade for a large star "bead". Use the large tip and blue icing to create the bigger beads and to write words. Lastly, I used some icing to "glue" my chocolate cross to my rosary and my chocolate chalice to the top of the cake. It was hard to see the white chalice so I trimmed it with some blue icing.

Thanks for stopping by! Alicia
Skip To My Lou

Sunday, April 8, 2012

Operation: Egg Hunt

Hello! I had a marvelous Easter and I hope you all did too! Last year I hosted our church Easter Egg Hunt and was asked to do it again this year. I was flattered and was happy to go at it again. Hopefully, I will be able to do it again next year. There is something about a party that I just love. Here are a few peeks into our Easter Egg hunt:
delicious cupcakes I baked up using Funfetti cake mix and Funfetti icing


See the Resurrection set in the background? My youngest son and I printed it from Catholic Icing and I cut it out and assembled it.


Here is the entire set-up

Hunting for eggs! That's my youngest son in the blue shirt and plaid shorts. He is getting so big!

How do you like these signs? I used letters from Dollar Tree and traced them onto purple paper and cut them out. The green numbers and letters are the original ones. Do you notice something on every poster? Look closely and you will see the Alleluia printables that I printed from Crafolic's blog! I planned to use them on my cupcakes but they look beautiful on my signs.

The entire hunt was $0 out of pocket other than a few materials I purchased and the eggs and candy that was all donated by the wonderful parishioners at our church!

Thanks for stopping by!
     Alicia

Friday, March 16, 2012

Last Minute Idea: St Patrick's Day

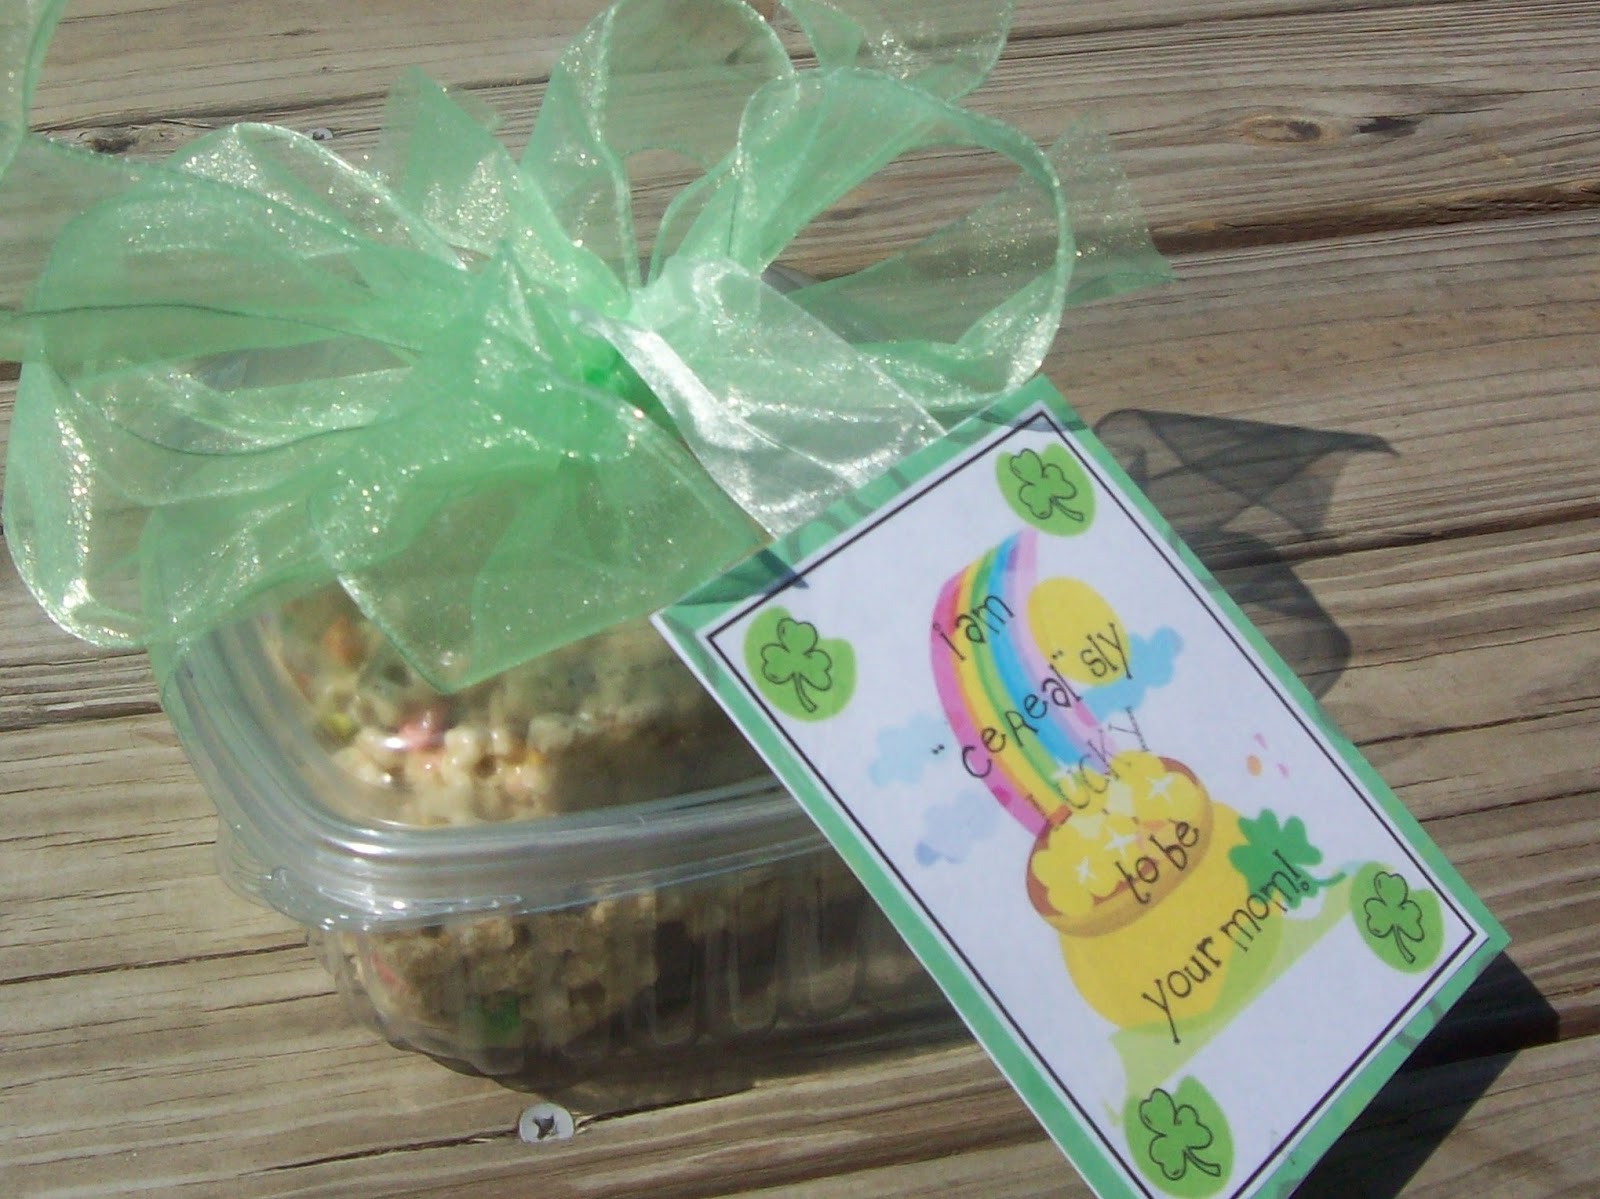
I saw a really cute snack idea on Pinterest for St Patrick's Day and decided to replicate/tweak it a little. The original idea showed a tag wrapped around a prepackaged bowl of Lucky Charms. I made some marshmallow bars for mine.

Before you begin, print out a tag for your treats. Just save my image below to your computer and print to whatever size you prefer. I used the 4x6 photo size for mine. You have my permission to use my graphic for your personal use but PLEASE link back to me if you post it on the internet and do not offer my tag on your site.


Lucky Marshmallow Bars

Ingredients

Lucky Charms or similar cereal (I used Kroger brand)
1 bag mini marshmallows
3tbs butter plus some for your pan
1tsp vanilla flavor (I use the cheap kind)
baking dish for forming treats

Melt your butter in a pot over medium heat. Add marshmallows and stir, stir, stir until they melt. Add vannilla and remove from heat. Gently pour cereal into marshmallows and stir. Continue to add cereal until it is coated to the consistancy you prefer (general rule is about 6 cups). Now transfer your mixture to your greased pan and allow it all to cool.

Remove cooled treats from pan and cut into bars. Place bars into an upcycled cookie container like the one I used or to preferred container (I ussually use individual ziplocs for my boys). Add a pretty ribbon and the free tag from this post to decorate!


PS Yes that is my back porch. I love natural light and can't get much inside my house. Yes, it is beautiful outside today, too! :)

Skip To My Lou
Thanks for stopping by! Alicia

Friday, March 2, 2012

Happy Birthday Dr Seuss!! (and recipe!)

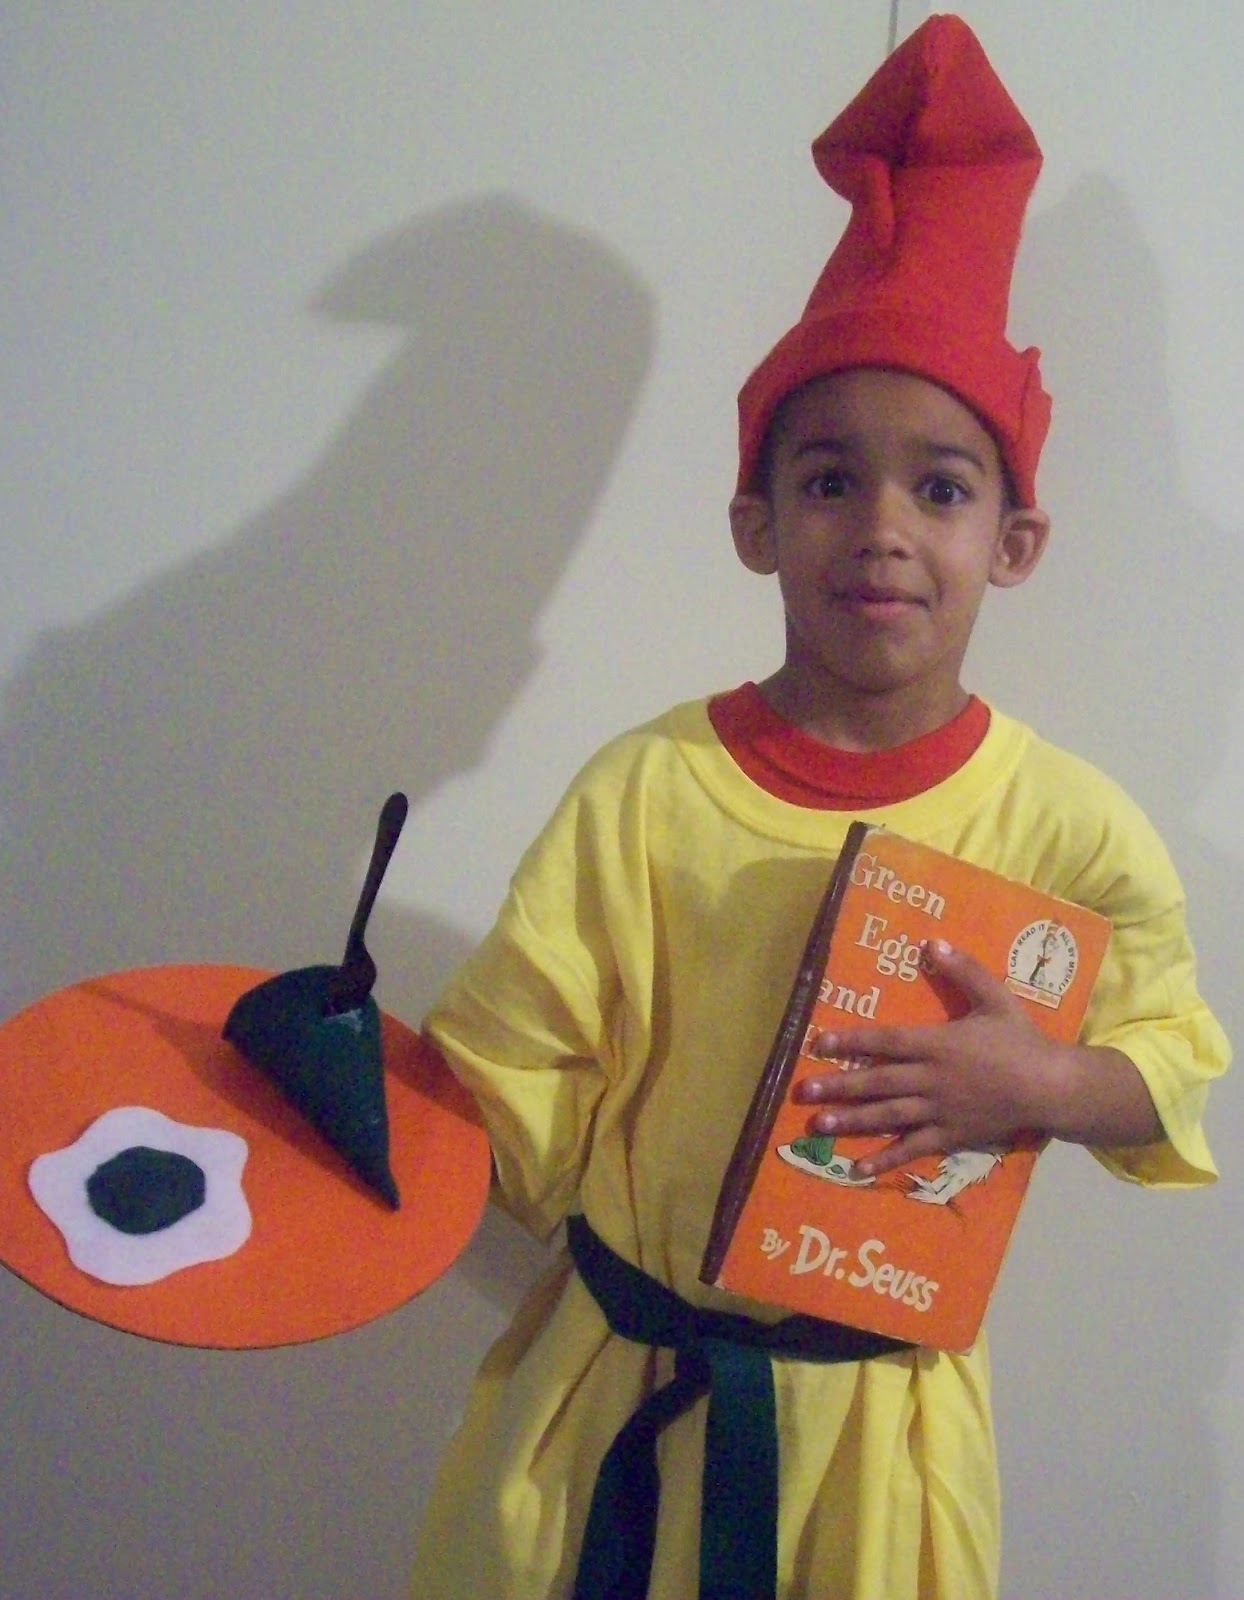
My son's silly face. He is holding my copy of Green Eggs and Ham from when I was a little girl!

Today is Dr. Seuss's Birthday!! My youngest son will be participating in a parade today and I will be posing as the famous cat (the one in the hat!) at my center today. I also made some yummy chocolate green eggs for my son to share as he goes to school looking a lot like "Sam I Am". 
 Chocolate Green Eggs:
White chocolate bark
green m&ms

Using a double boiler, the microwave, or my prefered method, a small pot inside a large pot of boiling water, melt 4 squares of chocolate bark. Using a regular teaspoon, dip out some chocolate and tap the spoon lightly on some waxed paper. Add a green m&m (upside down!) to the top and you have some very simple and delicious treats!

Makes about 30 candies

Skip To My Lou
Thanks for stopping by! Alicia

Monday, June 27, 2011

Book Review: Wanda Brunsetter's Amish Friends Cookbook: Desserts


When I saw the title to this book, I knew I had to review it. I am an “all things Amish” junkie. I have been since visiting Lancaster, PA on a field trip as a child. The book offers recipes for all of the well’known Amish desserts like boyfriend cookies and shoo-fly pie. There were also recipes for interesting desserts such as Ice Cream Jello and Honey Bun Cake.


I decided to test out the recipe for Honey Bun Cake. My husband and children love honey buns so it seemed like a good choice. I baked the cake following the directions exactly. The cake turned out smelling and looking wonderful. I allowed my family to give their opinions on the taste. My boys thought that the cake was delicious. My husband and I were disappointed that it was not as sweet as we expected. I think that it could be remedied by making a double batch of glaze.

The recipes in the book are all written in easy to understand terms. Some of them are very simple and none of them look extremely difficult. I would love to check out Wanda Brunstetter’s other Amish cookbooks after sampling this one. Thank you to Barbour Publishing, Inc for offering this book to me free of charge through netgalley!


Thanks for stopping by! Alicia

Wednesday, June 15, 2011

WIWW: Thank God for Good Morning Girls!

This week, instead of discussing a Bible verse that touched me, I thought I would share with you what the Good Morning Girls ministry has done for me in the four short weeks I have been participating in the book club.
Before I joined the Good Morning Girls book club, I was struggling to read my Bible. I don't come from a religious family so I never learned how to read the Bible, let alone study it. I've read tons of books about the Bible, Christianity, and Catholicism where the author tells of all the benefits of studying the Bible but doesn't tell me how.

One day, I was perusing my blogger feed, looking for interesting posts on the blogs I follow and I saw Jolanthe's post inviting her readers to join her in this book club. I immediately figured out a way to get the book loaded onto my Kindle and was ready to join in. I don't know why I felt called to join other than that God must have wanted me there.

So, I joined the book club and learned the SOAP method. This was my saving grace! Since learning the SOAP method, I understand scripture much better and I look forward to my Bible study time each day. I have enjoyed this book club immensly and can only pray that Good Morning Girls offers them every season from her on out!

Thank God for Good Morning Girls!

Thanks for stopping by and God Bless!
Alicia

Friday, June 3, 2011

MOM Book Club- Week 3 Wrap-Up {and free printable}


Oh, what a week! I have been catching myself with my nose in the five books I am currently reading instead of paying close attention to my children. I do notice that when they call on me, I hear a voice say "drop everything and pay attention" and I ussually do it!

The verses this week have been a little harder for me. There is more "reading between the lines". Being the worry-awart I am, I always worry I'm reading the "wrong thing" into it. Then I remind myself that this is the Bible and God may very well say something unique to me through it. It's okay to be different!

So, you are probably wanting me to get to the wrap up, huh? Well, I wrote earlier this week about John 21:4-14. Now I am going to give you my personal insight into John 14:1.

Week Three


I chose today’s passage: John 14:1
S- Write out the scripture passage for the day

"Do not let your hearts be troubled. You have faith in God; have faith also in me"


O- Write down 1-2 observations from the passage

1. Faith= trust even when you don't know what is going to happen

2. "Do not let your hearts be troubled"- why? because it is unnecessary. Faith makes it so your heart need not be troubled.


A-Write down 1-2 applications from the passage

1.  Stop Worrying!!! If you are not a "good mom", your faith in God and Christ will overcome that!

2. Practice faith- Trust in God!


P- Pray over what you learned from today’s passage


Prayers for the week

Monday: Lord, I love you! I love my children. Please help me to love everyone I encounter intensly, even when I don't "feel" like it. Amen


Tuesday: Lord, thank you for all of your blessings. Please continue to bless me as I strive to show your love to my children and the world. Amen.


Wednesday: Dear Lord, I know I don't show you how much I love you nearly enough. Please forgive me. I try to love my neighbors, please help me discern who needs my help... Amen


Thursday: Dear Lord, I hold you in high esteem in my heart. Please help me to show you and the world how I feel about you! Amen


Friday: Lord, I place all of my worries at your feet. I have faith that you will take care of me. Amen.


(I use the New American Bible Translation)

FREE PRINTABLES

Here are some print outs I made for the Introduction and Part One questions in the Ministry of Motherhood book. Please overlook the watermark but I have been seeing a lot of my blog friends have thier work stolen by people who are supposed to be of Christian faith...


Thanks for stopping by!
 Alicia

I am linked up to the following:
No Ordinary Moments Blog

Wednesday, June 1, 2011

Reflections: Throw your nets to the other side....

Jesus said to them, "Children, have you caught anything to eat?" They answered him, "No." So He said to them, "cast your net to the right side of the boat and you will find something." So they cast it and were not able to pull it in because of the number of fish.
-John 21:5-6


Today I just wanted to talk about a scripture verse that stuck with me. While studying with "Good Morning Girls", I was reading John 21:4-14 yesterday. The part that really struck me was when the disciples listened to Jesus, they were not just blessed with thier next meal, they were blessed with enough to feast upon and to share with others.

How often do we recieve abundant blessings when we do as Christ instructs us? EVERY time! How often do we share them? Well.... that's a little harder to answer, isn't it? I know that I do not share my blessings nearly enough. When I get extra money, I tend to buy things I have been wanting for a long time. Instead, I should be giving some of it to charity, to my church, or to the church building fund.

How often to we actually listen to God? Another tough question. I often catch myself saying to God, "But... I don't want to... I don't like it... it's not fun...choose someone else..." Do you hear yourself saying these things? If we would do the things God is asking of us, we would not only be doing God's will, we would also recieve ABUNDANT blessings!

FUN FACT: Did you know that the fish that Peter caught were Talapia?

I am really enjoying this Bible Study and Book Club at Good Morning Girls. If you are interested, it is never too late to join in! It has been a true blessing in my life in the past three weeks and I know that it would be for you too.

God Bless!
Alicia

I am participating in:
Related Posts Plugin for WordPress, Blogger...