Showing posts with label Christmas. Show all posts
Tuesday, January 31, 2012
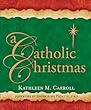
Book Review: A Catholic Christmas
I know what you are probably thinking while reading the title of this post. You are wondering what took so long for me to write a review on a Christmas book! Well, Christmas only ended a few weeks ago! This easy-to-understand book by Kathleen M Carroll has information about Saints from Advent throughout the Christmas Season. Each chapter focuses on one Saint whose feast day occurs during the Advent/Christmas Season.
I enjoyed this little pocket-sized book. My favorite part about this book was it's size. It was easy to keep in my purse and pull out while waiting at the doctor's office or while relaxing before bed. The chapters are not long and are chock full of interesting facts about the saints. This book could be used as a mini devotional or it could be used as I did- as a refresher throughout the Advent season. It gave me some spiritual medicine in-between Sundays. This helped me to keep my heart and my mind focused on the real reason for the season- Jesus! I recommend that you put this book on next year's Christmas gift list. It would be a perfect gift along with a small Bible or Rosary and possibly even a cup of hot cocoa mix!
This review was written as part of the Catholic book reviewer program from The Catholic Company. Visit The Catholic Company to find more information on A Catholic Christmas. They are also a great source for a Catechism of the Catholic Church or a Catholic Bible.
Thanks for stopping by! Alicia Tweet
Saturday, November 12, 2011
Book Review: Santa's Secret Story
Do you know Santa’s secret? If not, you will want to grab a copy of “Santa’s Secret Story”. This children’s book tells of Santa’s secret through a helpful guardian angel. Included in the text is a prayer to Saint Nicholas and short bio on the beloved saint. Also, in the story, the guardian angel prayer is recited.
I love this book! I don’t even know where to begin. First off, this story totally dispels the myth that Santa does not exist! No more worries about someone telling my kids that lie! Santa existed as Saint Nicholas 1700 years ago. The book details the life of Saint Nick and tells how he became Santa.
This book is great for kids of all ages (including parents!). The book is completely orthodox and is interesting. The illustrations are attractive. I cannot say enough great things about this book.
I plan to use this book on December 6, the feast of Saint Nicholas. Last year I made my boys some Saint Nicholas treat bags and I am planning to continue the tradition. I am thinking of bringing this book to REP with me and teaching my fourth graders about the life of the real Santa!
This review was written as part of the Catholic book reviewer program from The Catholic Company. Visit The Catholic Company to find more information on Santa's Secret Story. They are also a great source for a Catechism of the Catholic Church or a Catholic Bible.
Thanks for stopping by! Alicia Tweet
Monday, September 19, 2011
Book Review: World's Greatest Christmas Cookies
The book,"World's Greatest Christmas Cookies" is a yummy compilation of Christmas cookie recipes! The book is divided into sections by type of cookie including no-bake and bar cookies. All of the cookies are perfect for sharing and the recipes are easy to understand.
I cannot wait to get started on my Christmas baking! This book is the most comprehensive cookie recipe book I have seen. This book includes old favorite recipes and new recipes that look interesting and tasty. If you are planning to bake a lot of cookies this Christmas season, I recommend that you grab a copy of this book!
Thanks to the publisher for offering this book to me free of charge in exchange for my honest review through Netgalley.
Thanks for stopping by! Alicia Tweet
I cannot wait to get started on my Christmas baking! This book is the most comprehensive cookie recipe book I have seen. This book includes old favorite recipes and new recipes that look interesting and tasty. If you are planning to bake a lot of cookies this Christmas season, I recommend that you grab a copy of this book!
Thanks to the publisher for offering this book to me free of charge in exchange for my honest review through Netgalley.
Thanks for stopping by! Alicia Tweet
Tuesday, September 6, 2011
Book Review: Christmas Stories
I just finished reading the book "Christmas Stories" by Max Lucado. It is a collection of heartwarming stories about the real meaning of Christmas- the birth of Jesus Christ. The stories all come from previous works of Max Lucado's and have been combined to create this book.
While it was not one of Max Lucado's best books, it is a good book for getting into the Christmas spirit. I originally read it hoping to find something good to read during Advent. There are a few stories that I plan to share with my children this Advent but it did not deliver like I expected.
If you are an avid Max Lucado reader, you have already read the stories that are included in this book. Overall I would consider this a good gift but not something I would suggest for a personal purchase.
Thanks for stopping by! Alicia Tweet
Sunday, December 19, 2010
Christmas Cookies!
Well, this year my mom is under the weather so I decided that I would finally crack open my cookie press and attempt to do the job of the ol' faithful Super Shooter. My youngest son and I mixed up a new batter I found in a cookbook. I added some green food coloring and we used the tree and circle shaped tips and got to work. The cookies turned out beautifully and I cannot wait to share some with my mom! I feel sorry for the old Super Shooter because I actually found the sumple press to be less messy and more precise. The Super Shooter will always hold a special place in my heart!
Here's what Old Faithful looks like:
And his replacement:
The recipe (with my little tweaks added):
2c butter (I used butter flavored Crisco)
2c sugar
3 eggs
2 tsp vanilla extract
6c all-purpose flour
2 tsp baking powder
colored sugar (we made our own using food coloring and sugar)
green food coloring (I used Wilton icing coloring)
In very large bowl, cream butter and sugar. Add eggs and vanilla, mix well. Combine flour and baking powder then gradually add to creamed mixture and mix well. I then added my green food coloring until I got desired color. Also, if you are using a handheld mixer, be careful! I almost burnt mine up!
Using cookie press fitted with tree or circle disk, press dough 2in apart on ungreased cookie sheet. Decorate with sugar. Bake at 350* for 8-10 minutes or until set. Remove to wire racks and cool completely.
ENjOY!
Thanks for stopping by!
Alicia
I am participating in:
Thursday, December 16, 2010
Gotta Love Frapp Bottles!!
Have you ever waited until the last minute to make teacher gifts?? Well, I end up doing it every year! This year I was SURE that I was going to find something online or just think of something cool in plenty of time to make for my kids' teachers.... it didn't happen. So, last Saturday, I was at my mom's house when I noticed her collection of Starbucks Frappacinno bottles was sitting on her porch waiting to go to storage. See, she has been saving them for me to decorate. I think they are SO cute and never thought to make these this year. Oh, and did I mention that they are SUPER easy??
I did everything by eyeball. I first decorated some white cardstock with a peppermint candy stamp and red ink. You can use patterned paper for a simpler decoration. I cut this into strip about 2 inches wide and ... about 9 inches long- but measure yours before you cut! It may be different!
I then cut my coordinating cardstock (green) about 2 1/2 inches by 9 inches.I glued the green cardstock onto my bottle first, then added the patterned paper.
Next I used the same stamp and a "Merry Christmas" stamp and my scalloped circle cutter to create the tag. Usually I attach my tag with ribbon but decided to try out the pipe cleaner squiggles I saw here. I threaded my tags onto the squiggles and thought it was cute.
Finally I filled the bottles with Starlight Mints and topped them with my free Pocket Wishes that I won online! I love those little tokens. They are really cute and a great way to say "Thank You!".
Some Tips:
Thanks for stopping by!
Alicia
I am participating in:


Covered Frapp Bottle Tutorial
I did everything by eyeball. I first decorated some white cardstock with a peppermint candy stamp and red ink. You can use patterned paper for a simpler decoration. I cut this into strip about 2 inches wide and ... about 9 inches long- but measure yours before you cut! It may be different!
I then cut my coordinating cardstock (green) about 2 1/2 inches by 9 inches.I glued the green cardstock onto my bottle first, then added the patterned paper.
Next I used the same stamp and a "Merry Christmas" stamp and my scalloped circle cutter to create the tag. Usually I attach my tag with ribbon but decided to try out the pipe cleaner squiggles I saw here. I threaded my tags onto the squiggles and thought it was cute.
Finally I filled the bottles with Starlight Mints and topped them with my free Pocket Wishes that I won online! I love those little tokens. They are really cute and a great way to say "Thank You!".
Some Tips:
- I suggest that you use a wrapped candy to fill your bottle. I am a teacher and I am always a little leery of eating unwrapped foods, as are my coworkers
- Check out Lizard and Ladybug's etched glass frapp bottle for a little different take on the same idea!
- I used some scotch tape to secure the patterned paper over the solid cardstock
- Have fun and send me a link if you make one!
Thanks for stopping by!
Alicia
I am participating in:


Tuesday, December 14, 2010
Christmas Crafts: Card Display
When I saw this Christmas Card Display, I KNEW I had to replicate it! Before I tell you what I did, I have a confession...
I used to have a Cricut Cutting Machine. Yes, used to. Years ago when they first came out. And I never used it. Never.... SO rest assured, all my cutting machine deprived friends, this display required NO machine. Only my two hands, some paint, and some glue!
What do you think?? Please leave a comment and let me know if you made one too!
Thanks for stopping by!
Alicia
I am participating in:
I used to have a Cricut Cutting Machine. Yes, used to. Years ago when they first came out. And I never used it. Never.... SO rest assured, all my cutting machine deprived friends, this display required NO machine. Only my two hands, some paint, and some glue!
Christmas Card Display Tutorial
1. First I needed to find something to make my display out of. I looked in my craft closet and found some blank plaques I purchased at Dollar Tree a while ago. They really didn't look big enough so I used my hot glue gun and some popsicle sticks to attach two plaques together and made it super long. So basically, find you something to make your display out of!
2. Next I used some scrapbook paper and glued it to my boards. I then used some VERY FINE sandpaper and went over the edges lightly. This gave it a distressed look. After that I mixed some glue and water and went over the entire thing. I got kind of worried because the paper crumpled. After it dried, it flattened out and looked great.
3. I then painted my chipboard letters that spell out my greeting. I chose "for God so loved the world..." because it is a reminder to me that God planned on this Christmas baby to give our Easter sacrifice. Chipboard letters can be found almost anywhere these days. Big Lots is the cheapest place if you can find them. If you can find the right color, you won't have to paint thm either! I just used what I had in my stash. I also painted the larger letters with glue and poured glitter over them. Attach the letters to your board now. I used hot glue but you can use craft glue or adhesive.
4. Next, I cut some patterned paper to cover my clothespins. I glued it on and then went over them with light sandpaper. I used my hot glue to attach them to the bottom of my board. I had one left over so I attached that to the upper righthand corner of my board for my current Christmas Card!
Thanks for stopping by!
Alicia
I am participating in:
Wednesday, December 8, 2010
Christmas Ornament Show and Tell
When I saw that "No Ordinary Moments" was hosting an ornament show and tell linky party, I knew I just HAD to participate. Like her, many of my ornaments hold a story and I would love to share some of them with you!
I bought these ornaments about 6 years ago at the Dollar Tree. I was excited to get everyone's name on an ornament. We need one more for our third son but I doubt they had an "Antonio" one anyway lol.
Thanks for stopping by!
Alicia
I am participating in:
I was given this ornament, handmade by a nurse from the Hospital of University of Pennsylvania when I went in to get tubes in my ears as a small child. I remember the day very clearly and this puppy reminds me of how sweet everyone was to this anxious little girl.
This is my all-time favorite ornament. I don't remember what year it was gifted to me but one of my friends from church has given me a Christ-centered ornament every year since I was baptized Catholic.
I bought these ornaments about 6 years ago at the Dollar Tree. I was excited to get everyone's name on an ornament. We need one more for our third son but I doubt they had an "Antonio" one anyway lol.
Thanks for stopping by!
Alicia
I am participating in:
Subscribe to:
Posts (Atom)