Showing posts with label crafts. Show all posts
Monday, June 3, 2013
Eagle Craft Re-Mix @ Catholicmom.com
Today my Eagle craft from a few years ago found its way over to Catholic Mom. Click over and see how to make this cute craft along with free printable Bible Verse to memorize!
Friday, January 4, 2013
Holy Name of Jesus Craft
January is the month dedicated to the Holy Name of
Jesus with the actual feast day falling on January 3 this year. It is
celebrated in January because eight days after the birth of Jesus, he would
have been circumcised and his name would have been announced. There are
hundreds of names and symbols that we, as Catholic Christians use to identify
Jesus and January is a month in which we can give special praise to Him for
being our Savior, Redeemer, Protector, and sweet Lamb of God who takes away the
sins of the world.
This craft, celebrating the Holy Name of Jesus combines the actual name “Jesus” with a picture of Jesus serving the first Eucharist. It is a simple craft that children of all ages will enjoy.
Items Needed:
·
Holy Name of Jesus Printable (click here)
·
Photograph of Jesus printed as full page:
·
Glue
·
2 pieces of construction paper taped together
lengthwise
First, cut the photograph and the
name of Jesus as closely to 8 inches wide as possible. Then stack them on top
of one another and cut into 1 inch strips, keeping them together. You can
number the strips at this point but I found it was easy to piece together as
long as I kept the name piece with the photo piece.
Spread glue all over the
construction paper and begin piecing the strips onto the construction paper,
keeping the bottom of the strips even with the bottom of the construction paper.
Begin with the name strip and then place the photo strip that is stacked with
it. Repeat with the next set of strips until all of the strips have been
placed.
Monday, August 6, 2012
Monday, July 23, 2012
Catholic Dreamcatcher Craft
Sunday, June 17, 2012
Sacred Heart of Jesus Bag
Did you
know that the Catholic Church dedicates each month to a special devotion to
increase our faith lives? I honestly didn’t know that our church had these neat
themes each month throughout the year until about two years ago. In addition to
my two favorite Liturgical seasons, Lent and Advent, each month is dedicated to
a special devotion.
June is the month dedicated to the Sacred Heart
of Jesus. The formal devotion of the Sacred Heart is attributed to Saint
Margaret Mary Alacoque (1647-1690), a Visitation nun who had a personal
revelation in the form of visions of Christ as she prayed before the Blessed
Sacrament.
I thought
that a Sacred Heart of Jesus bag would be a unique idea for carrying my
Religious Education materials back and forth from home to the classroom. It is
very easy to make your own Sacred Heart bag with your child. Here’s what you
need to do:
1.
Gather
supplies. You will need red, orange, and grey or black fabric or acrylic paint,
a paintbrush, glue (I used hot glue), toothpicks, and a bag (I bought mine at
Dollar Tree). If you are using hot glue (mom only!) then plug it in now.
2.
Paint
your child’s right hand first and then placed it on the bag at a slight angle. Clean
that hand and then paint the left hand. Place it at the opposite angle so that
it forms a heart shape. Now completely wash hands before moving to step 3.
3.
Using the orange paint, paint the tips of all
fingers except the thumb. Press them down directly above the heart to create
the flames. Then wash hands one more time.
4.
Using
the grey fabric paint, trace the outline of the heart and flames and allow it
to dry.
5.
Now
have your child break a bunch of toothpicks to create the thorns that will
encircle the heart. Now mom can glue them in an “X” pattern across the heart.
6.
Optional:
my son added glitter glue to our Sacred Heart but you and your child can add
any decorations to the rest of your bag that you would like. You can add your
name, a Sacred Heart prayer, or even an Immaculate Heart of Mary using silk
roses in place of the toothpicks. Instead of a bag, you can use a t-shirt,
paper, or art canvas. The possibilities are as endless as your imagination
allows!
Thanks for stopping by!
Alicia
Sometimes I link up at: First Friday Linkup, Made By You Monday, Weekend Wrap Up Party, Tea with St Anne, Titus 2sdays, Women Living Well, Catholic Bloggers Network,
Rosary Mom
Wednesday, May 2, 2012
DIY Mass Bag
Do you have trouble getting your kids to behave during Mass? I do! Although my children are 6, 8 and 12, I have a very hard time with my two youngest boys. It doesn't help that they have both been diagnosed with ADHD and I am the only church-attending parent.
With all of these hindrances, there have been days that I wanted to throw my hands up and retreat. Until I discovered the idea of Mass Bags, that is.
While perusing the internet, I saw some great ideas for "Busy Books" and things generated by LDS moms and I realized that they are on to something. I continued to read blog posts about these ingenious inventions and knew I needed something like this for use with my own boys.
My children are older than most children who need something to keep them busy so it was hard to find anything that was geared towards my children's ages so I decided to put something together myself.
First I considered making a busy book but decided that my boys were not really going to sit and complete the activities. So then I got the idea to fill one of our bags with things to keep them busy. Many DIFFERENT things so that they would not become bored within the one hour that we sit quietly during Mass (If you have a child with ADHD or Autism, you may be able to relate). So, here is what I came up with:
1. Coloring Books and pages printed from the internet. I try to rotate these during different liturgical seasons and feasts of the church. For example, in the picture, I have coloring books about the Passion of Christ- I am changing out the Lent stuff today and am going to print some great Easter/Communion stuff for April/May. Need some freebies to print? Check out these great free resources:
Holy Heroes- I print a lot of stuff from here. During thier Lenten, Advent, and Summer Adventures, there are tons of freebies available. Check in often for some free samples,too. I have also purchased some of thier coloring books~ great high-quality books!
St. John The Baptist Catholic Church Religious Ed Department- a coloring page for almost any Catholic topic you can imagine!
Catholic Toolbox- has links to lots of handwriting coloring sheets and other great printables for your Mass Bag!
Catholic Kids Weekly Mass Bulletin- a great way to catechize your children while keeping them quiet!
Check out my "Catholic Kids" Pinterest board for tons of freebies that I collected all over the web!
2. Small Linking Toys or Kids Meal toys that are appropriate. The linking toys in the photo are actually kids meal toys from Wendy's. I combined the boys toys to create a mini playset. These are great for quiet building.
3. Catholic Games that only require one player. You don't want your kids mingling with one another- or worse- with someone else's kids while they are supposed to be reverent. I have some Patron Saints Catholic Cardlinks
Saint Joseph Memory Match Game- print two sets and put them in a ziploc
The Good Shepherd Number Order Game Use this game to practice putting numbers in order
Christian Sticker Matching Game I just bought a few more packages of these stickers from Dollar Tree before they are gone. They seem to reappear during Lent... If you cannot get them there, perhaps you can split with someone and purchase them from Autom.
4. Other Stuff like crayons, stickers, blank paper, Religious Ed leftovers, etc.
These bags can be adjusted according to your child's age and attention level. I know some people may disagree with the idea of a child doing anything but sitting in the pew quietly (believe me, I have met my fair share in my own parish) and I believe that children should eventually learn to be as quiet and reverant as we adults. Until then, I will be in the "training room", doing just that- training my boys.
Thanks for stopping by! Alicia

Wednesday, April 25, 2012
Pike's Playground Challenge
As you know, I am somewhat of a fan of Dustin Pike's creations.... you could even say I am slightly obsessed with Dudley Dragon.
Well, last week he had some great images, 77 in all- for only $10! I quickly bought them and began creating cards. When I saw the image with Dudley on a float, squirting water, it reminded me of my little cousins in Maine who visit Georgia in the summer. Last summer their grandma got sick and asked my mom and I to escort the kids to a huge waterpark for FREE.
As soon as I saw the image I knew that card would be for them!
Thanks for stopping by! Alicia
Well, last week he had some great images, 77 in all- for only $10! I quickly bought them and began creating cards. When I saw the image with Dudley on a float, squirting water, it reminded me of my little cousins in Maine who visit Georgia in the summer. Last summer their grandma got sick and asked my mom and I to escort the kids to a huge waterpark for FREE.
As soon as I saw the image I knew that card would be for them!
(The paper is from Cosmo Cricket's "Snorkel" stack)
Thanks for stopping by! Alicia
Tuesday, April 24, 2012
Religious Keepsake Box Tutorial
My middle son will be receiving his First Holy Communion later this month. I knew I wanted to create a First Holy Communion gift for him but I was lost as to what I wanted to create. After contemplating ideas, I decided to create a little religious keepsake box using some new papers that I bought at Big Lots this week.
Religious Keepsake Box Tutorial
What you need:
Animal Crackers Stack by DCWV
ModPodge
paintbrush
scissors/paper cutter
small wooden box (bought mine at Dollar Tree!)
Jesus sticker (also from Dollar Tree)
sandpaper
What to do:
First I traced the top of my box onto the wrong side of the paper I used for the lid and cut it out. Then I cut strips of paper in the width needed for the sides. My strips do not go all the way around. I opted to stop them at the back (because they weren't long enough and the hinges are in the way anyway). I assembled these pieces before moving on to the inside.
I used a paintbrush and ModPodge to coat the top of the box and the back of the paper and then pressed the paper onto the lid. I made sure that any overlap was evenly distributed around the box. Allow that to cure for a few minutes before moving on. Using sandpaper, gently sand the overlapping edges down the sides of the box. Sand them off completely if possible.
I then repeated the above step to do the sides. I also used some binder clips to hold the paper on the sides while they cured.
You can now coat the entire outside of the box with ModPodge and allow to dry. After dry, begin on the inside...
I measured my inside and it was approx. 2 1/4in x 3 3/4in. I cut two pieces of paper this size (one for top insert and one for bottom). Using ModPodge, attach the papers to the inside of the box.
Before sealing the inside pieces, I decorated the top insert with my stickers. I used a "WILD" sticker that came with my paper stack and then printed a label that said "ABOUT" using my label maker. Finally I matted my Jesus sticker (I chose the one with the Eucharist for my First Communicant!) and attached it.
Using the ModPodge, seal the interior of the keepsake box. Allow to dry completely.
There are many things that can go inside this little box. Some ideas that I have are:
Rosary
Holy Card and Medal
Crucifix Necklace
Scapular
Can you think of anything else that would fit well in this little box? Let me know in the comments below!
EDITED TO ADD:
Here is my son with his box:
Thanks for stopping by! Alicia
I linked this free Jesus craft to:
Tuesday, April 17, 2012
Preparing for Bible Study!
Last summer I decided on a whim to join an online Bible Study and Book Club hosted by "Good Morning Girls". I had no idea what it was but it looked interesting so I bought the book and played along. I really enjoyed it and was mesmerized by the "SOAP" method of studying the Bible.
As soon as April came around this year, I eagerly scoured the Good Morning Girls site in anticipation to see if they had announced the newest Summer Book Club selection. I was excited to see that it is Courtney's new FREE book, The Proverbs 31 Woman. If you would like a free copy, jump to her site and subscribe to her blog- you won't be sorry!
Now, onto my project! I printed out my book (in booklet format) a few weeks ago and used my Bind-It-All to bind it together. Today I decided that it needed some dressing up so here's what I did:
| I used a paperclip and ribbon to create my own little bookmark. I attached it to the binding and even wove the ribbon all the way down the binding. |
| I glued a strip of scrapbook paper to the top and bottom of the cover to add a little pattern to my cover. |
| I also added some scrapbook paper to the back of my book! |
| I tied ribbons around the binding for a pop of color! I used all ribbons that I already had in my stash. The wide pink ribbon was some I salvaged off of a gift! |
I hope you enjoyed my little makeover of Courtney's book! If you are not signed up to join the book club, please consider it. I would love to start a group of my own if anyone is interested in joining me...
Thanks for stopping by! Alicia
Sunday, April 8, 2012
Operation: Egg Hunt
Hello! I had a marvelous Easter and I hope you all did too! Last year I hosted our church Easter Egg Hunt and was asked to do it again this year. I was flattered and was happy to go at it again. Hopefully, I will be able to do it again next year. There is something about a party that I just love. Here are a few peeks into our Easter Egg hunt:
Thanks for stopping by!
Alicia
delicious cupcakes I baked up using Funfetti cake mix and Funfetti icing
See the Resurrection set in the background? My youngest son and I printed it from Catholic Icing and I cut it out and assembled it.
Here is the entire set-up
Hunting for eggs! That's my youngest son in the blue shirt and plaid shorts. He is getting so big!
How do you like these signs? I used letters from Dollar Tree and traced them onto purple paper and cut them out. The green numbers and letters are the original ones. Do you notice something on every poster? Look closely and you will see the Alleluia printables that I printed from Crafolic's blog! I planned to use them on my cupcakes but they look beautiful on my signs.
The entire hunt was $0 out of pocket other than a few materials I purchased and the eggs and candy that was all donated by the wonderful parishioners at our church!
Alicia
Saturday, March 31, 2012
A Card for Emily
Thanks to the recent "Pike's Playground" challenge, I have started creating cards again! I made a few cards for loved ones and then I saw this post about a little girl named Emily. She is fighting leukemia and a myriad of other illnesses and her story touched my heart. I decided to create an Easter card to send to little Emily and I hope she enjoys it. My cards are quite simple compared to many of the other talented card makers but I hope that the love and prayers that I put into the card overcome any imperfections. Here's to Emily:
Thanks for stopping by! Alicia
Sunday, March 25, 2012
Selective Mutism Awareness Card
Have you ever heard of Selective Mutism Disorder? More than likely, you have not. It is a rare anxiety disorder that causes the person who has it to become mute in certain settings. It is most commonly noticed when children enter school and are mute.
This is not normal shyness. My son was mute in preschool and kindergarten. He played with other children, he smiled, he participated in activities. He loved school. But he was mute. By mute, I mean he made no noise- no coughing, no crying, no laughing. Noises that we make without thinking are noises that SM sufferers cannot make in anxiety-producing situations.
With a combination of therapy and one year of medication, my son is doing wonderfully. He still has some anxiety but has not been mute for about two years. If you think your child may suffer from this disorder, check out Selective Mutism Network. This is a valuable resource for parents who don't know where to turn. Also, I sent many prayers to St. Dymphna, patron saint of mental illness. Never underestimate the power of prayer!
Okay, now I guess you'd like to see my card, huh?
I bought the adorable digi stamps from Dustin Pike/ Doodle Dragon Studios. I LOVE his Dudley dragon images! He is giving one away free to those who participate in his latest challenge. I can't wait to play with it!
Thanks for stopping by!
Alicia
Follow me on Pinterest!
Monday, March 19, 2012
Portable Medicine Cabinet
Have you ever been at work, Wal-Mart, in the car and had a headache and no ibuprofen? Have you had a sudden attack of acid reflux and had no antacid? Have you had a sneezing fit and had no allergy meds? I have, too!
I got so tired of never having my appropriate meds that I finally created this portable medicine cabinet to keep in my purse!
I used an old craft container but a daily medicine box will work great. You can often get those boxes free or for a $1. I pulled out my label maker and labeled each section with the name of the medication that I am putting in the section. I made a section for:
1. Tylenol (Motrin, Ibuprofen gives me ulcers)
2. Excedrine (I have a tendancy to get migraines)
3. Allergy (I put some Chlortabs from Wal-Mart and then I found some generic Zyrtec at Wal-Mart for 88 cents!)
4. Zantac
5. Tums (Yeah, I have a bad stomach)
6. Cold Medicine (I don't need it right now but reserved it for later)
7. Extras
Now you can easily get to your clearly labeled medications tucked neatly inside your purse without adding any bulk.
Thanks for stopping by! Alicia
Friday, March 16, 2012
Last Minute Idea: St Patrick's Day
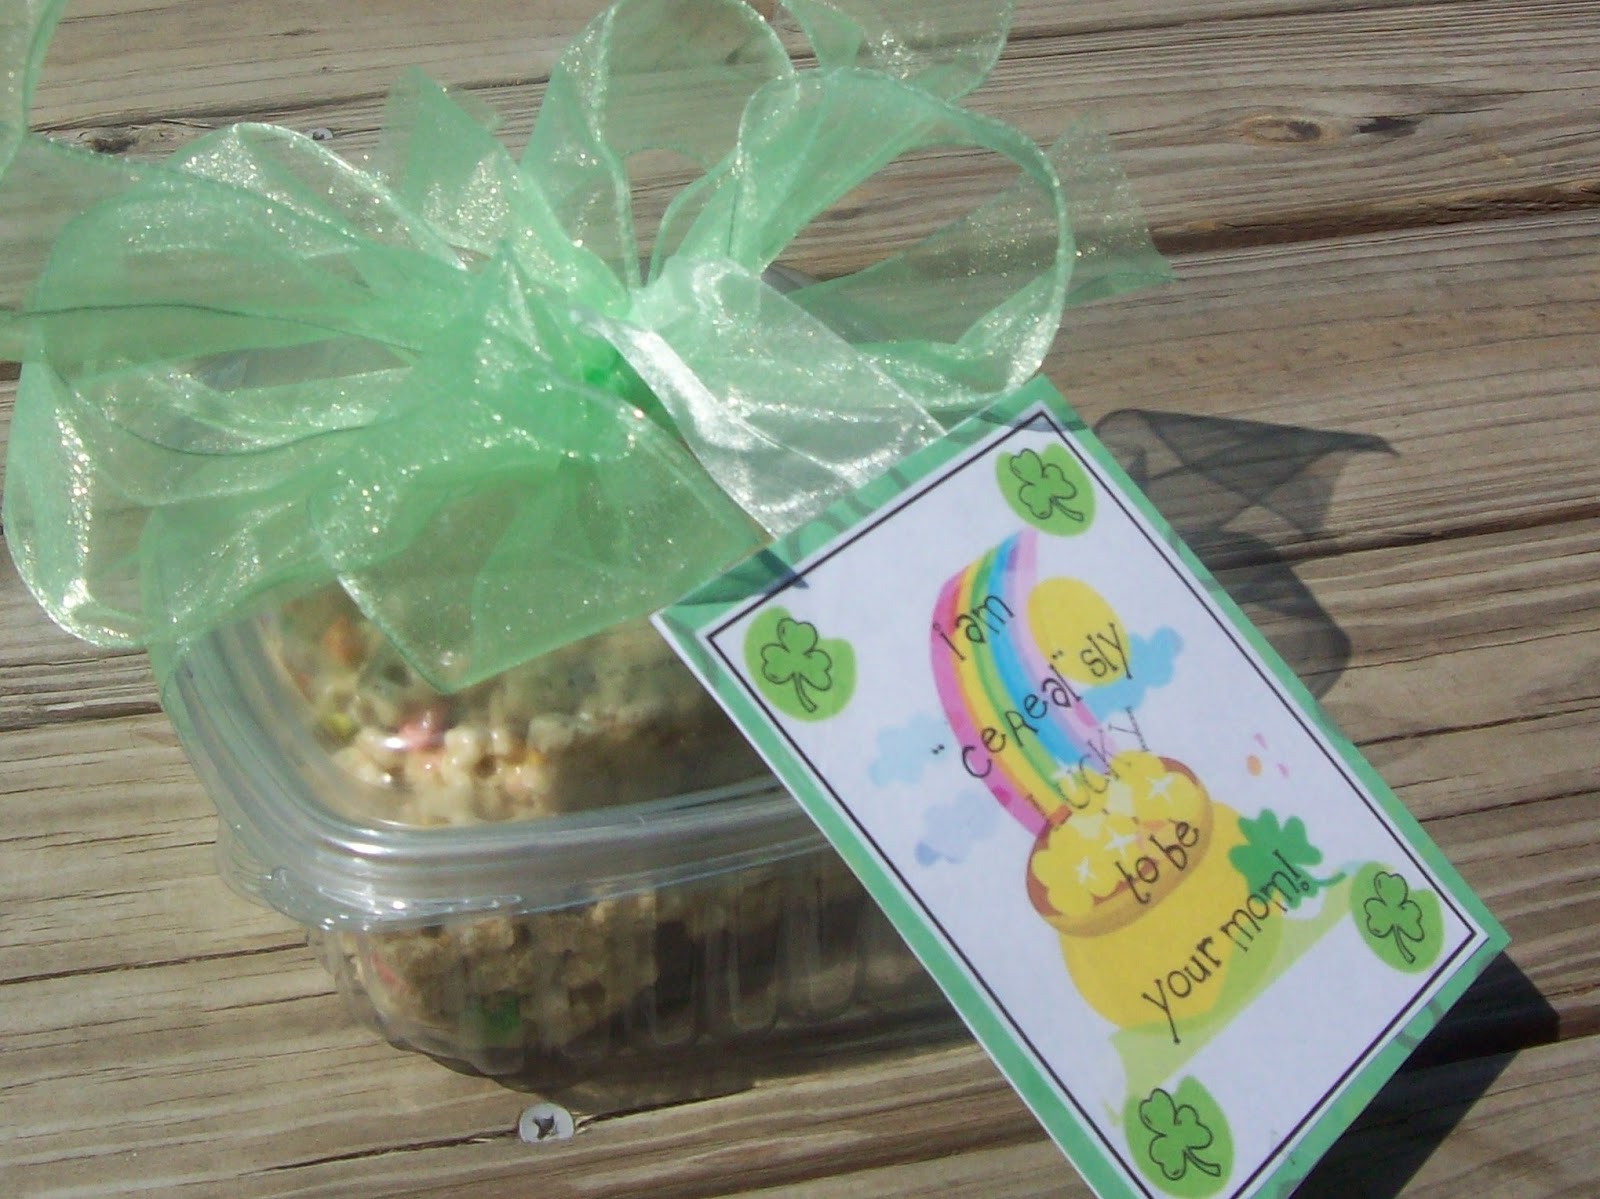
I saw a really cute snack idea on Pinterest for St Patrick's Day and decided to replicate/tweak it a little. The original idea showed a tag wrapped around a prepackaged bowl of Lucky Charms. I made some marshmallow bars for mine.
Before you begin, print out a tag for your treats. Just save my image below to your computer and print to whatever size you prefer. I used the 4x6 photo size for mine. You have my permission to use my graphic for your personal use but PLEASE link back to me if you post it on the internet and do not offer my tag on your site.
Lucky Marshmallow Bars
Ingredients
Lucky Charms or similar cereal (I used Kroger brand)
1 bag mini marshmallows
3tbs butter plus some for your pan
1tsp vanilla flavor (I use the cheap kind)
baking dish for forming treats
Melt your butter in a pot over medium heat. Add marshmallows and stir, stir, stir until they melt. Add vannilla and remove from heat. Gently pour cereal into marshmallows and stir. Continue to add cereal until it is coated to the consistancy you prefer (general rule is about 6 cups). Now transfer your mixture to your greased pan and allow it all to cool.
Remove cooled treats from pan and cut into bars. Place bars into an upcycled cookie container like the one I used or to preferred container (I ussually use individual ziplocs for my boys). Add a pretty ribbon and the free tag from this post to decorate!

Thanks for stopping by! Alicia
Before you begin, print out a tag for your treats. Just save my image below to your computer and print to whatever size you prefer. I used the 4x6 photo size for mine. You have my permission to use my graphic for your personal use but PLEASE link back to me if you post it on the internet and do not offer my tag on your site.
Lucky Marshmallow Bars
Ingredients
Lucky Charms or similar cereal (I used Kroger brand)
1 bag mini marshmallows
3tbs butter plus some for your pan
1tsp vanilla flavor (I use the cheap kind)
baking dish for forming treats
Melt your butter in a pot over medium heat. Add marshmallows and stir, stir, stir until they melt. Add vannilla and remove from heat. Gently pour cereal into marshmallows and stir. Continue to add cereal until it is coated to the consistancy you prefer (general rule is about 6 cups). Now transfer your mixture to your greased pan and allow it all to cool.
Remove cooled treats from pan and cut into bars. Place bars into an upcycled cookie container like the one I used or to preferred container (I ussually use individual ziplocs for my boys). Add a pretty ribbon and the free tag from this post to decorate!
PS Yes that is my back porch. I love natural light and can't get much inside my house. Yes, it is beautiful outside today, too! :)

Thanks for stopping by! Alicia
Subscribe to:
Posts (Atom)